Biochar: A Carbon-Sequestering, Soil-Enriching Powerhouse

In the world of sustainable agriculture and climate solutions, biochar has been quietly making waves. If you’ve never heard of it, biochar might sound like something from a sci-fi movie. But this unassuming material is both ancient and cutting-edge, holding immense potential for improving soil health and fighting climate change.

Let’s break down why biochar deserves your attention.

What Is Biochar?

At its core, biochar is a form of charcoal made by heating organic materials—like agricultural waste or wood chips—in a low-oxygen environment. This process, called pyrolysis, transforms the biomass into a stable, carbon-rich material that can be added to soil as a powerful amendment.

While its modern applications are exciting, biochar is far from new. Indigenous peoples of the Amazon have been using a form of biochar, known as “terra preta,” for centuries to enrich their soils. Today, we’re rediscovering its benefits, backed by scientific research.

Carbon Sequestration: Locking Away Carbon for Centuries

One of biochar’s standout features is its ability to sequester carbon. During pyrolysis, the carbon from organic matter is locked into a stable form rather than being released into the atmosphere as CO2. When applied to soil, this carbon can stay put for hundreds, even thousands, of years.

In a time when reducing greenhouse gas emissions is critical, biochar offers a win-win: it not only prevents carbon from re-entering the atmosphere but also puts it to work improving soil. This makes biochar a key player in regenerative agriculture and climate mitigation strategies.

A Haven for Beneficial Microbes

Soil health isn’t just about minerals; it’s about life. Healthy soil teems with bacteria, fungi, and other microorganisms that play essential roles in plant growth. Here’s where biochar shines: its porous structure creates a perfect habitat for these beneficial microbes.

Think of biochar as a microbe hotel. Its nooks and crannies provide shelter, while its surface can hold onto nutrients and water, making them more accessible to plants. By enhancing microbial activity, biochar helps create a more vibrant and resilient soil ecosystem.

Supercharging Soil

On top of its microbial benefits, biochar improves soil in other tangible ways:

  • Water Retention: Biochar’s porous nature helps soil hold onto water, reducing the need for irrigation and making it a game-changer in drought-prone areas.
  • Nutrient Efficiency: It acts like a sponge for nutrients, preventing them from leaching away and making them more available to plants.
  • pH Balancing: In acidic soils, biochar can help raise the pH, creating a more hospitable environment for plant roots.

The result? Healthier plants, higher yields, and less reliance on chemical fertilizers.

How to Use Biochar

If you’re a gardener, farmer, or land manager, incorporating biochar is straightforward. Here are a few tips:

  1. Charge It First: Raw biochar can initially absorb nutrients from the soil, so it’s best to “charge” it by mixing it with compost, manure, or a nutrient solution before application.
  2. Mix It In: Incorporate biochar into the topsoil, typically at rates of 5-10% by volume, depending on your soil’s condition and needs.
  3. Monitor Results: Like any soil amendment, the benefits of biochar depend on your specific conditions. Experiment and adjust as needed.

Biochar: A Tool for the Future

As we face growing challenges in agriculture and climate change, solutions like biochar offer hope. By turning waste into a valuable resource, biochar embodies the principles of circular economy and sustainable living. Whether you’re looking to boost your garden’s productivity or contribute to a healthier planet, biochar is worth exploring.

It’s not just a soil amendment; it’s a step toward a more sustainable future.

Creative Uses of AI for Homesteaders

In the age of rapid technological advancement, AI tools are no longer just for tech geeks and big corporations. Even homesteaders—those resilient folks dedicated to self-sufficiency and sustainable living—can find a surprising ally in AI. Beyond the usual tech buzzwords, here are several creative and often overlooked ways that AI can lend a hand on the homestead.


1. Garden Planning and Optimization

AI tools like garden planners or even general design software with AI integration can help you map out your garden for optimal growth. These tools can:

  • Suggest companion planting combinations based on your climate and soil type.
  • Help track seasonal frost dates and notify you of planting schedules.
  • Use satellite data to assess sunlight exposure for each part of your property.

2. Smart Livestock Monitoring

For those with animals, AI-driven monitoring systems can help ensure their health and safety. Some innovative applications include:

  • Cameras with AI that detect abnormal animal behavior, such as signs of distress or illness.
  • Automated feeding systems that adjust based on the animal’s needs or activity levels.
  • AI-powered drones to check on free-range animals or spot breaches in fences.

3. DIY Energy Management

Homesteaders who generate their own power through solar panels, wind turbines, or other means can use AI to:

  • Predict energy production based on weather forecasts.
  • Optimize battery storage usage.
  • Identify inefficiencies in energy consumption to save even more.

4. Preserving and Cooking with AI

AI doesn’t stop in the garden or the barn—it can also step into your kitchen. Recipe apps with AI capabilities can:

  • Suggest preservation methods (canning, fermenting, freezing) based on the type and quantity of your harvest.
  • Help you plan meals using what you have on hand, reducing food waste.
  • Offer step-by-step guidance for complex preservation techniques.

5. Weather Forecasting for Microclimates

Many homesteaders know that national weather services often miss the mark when it comes to specific local conditions. AI-driven microclimate tools can:

  • Learn patterns on your property over time.
  • Provide hyper-local weather predictions.
  • Alert you to conditions that could harm your crops or animals, like frost or heavy rainfall.

6. Wildlife and Pest Management

Managing wildlife and pests is an ongoing battle for many homesteaders. AI can help here, too:

  • Cameras with AI can identify specific pests or animals causing damage.
  • Smart traps that only activate for targeted species.
  • AI-generated reports on the best pest control methods based on your situation.

7. Homestead Education and Skill Building

Sometimes, the best use of AI is simply learning. AI tutors and video platforms can:

  • Teach you skills like welding, carpentry, or advanced gardening techniques.
  • Help troubleshoot problems by analyzing photos or videos of issues, like plant diseases or broken equipment.
  • Provide step-by-step guidance for DIY projects.

Embracing AI on the Homestead

The idea of using AI might feel a bit high-tech for the back-to-basics lifestyle many homesteaders strive for. But the truth is, these tools can free up time, reduce guesswork, and enhance the self-sufficiency that homesteading is all about. From planning your garden to keeping your livestock healthy, AI is just another tool in your homesteading toolkit.

Yaupon Tea: A Labor of Love

The only known plant native to the United States which produces caffeine, the leaves of the evergreen yaupon make a delicious tea.

While there are multiple ways to prepare the leaves for extracting their goodness, we prefer to roast the leaves before using them for tea. While this is much more work than other methods, the bolder flavor and more pleasing color of the end product is well worth the effort.

Speaking of effort, here’s a detailed breakdown of our process:

We wild-harvest limbs from trees at different locations around our property, as both the flavor and the caffeine content can vary based on the amount of sunlight the holly receives. This allows us to blend leaves for a more consistent product.

After the limbs have been harvested, we then carefully hand-select the healthiest leaves – leaves without damage or discoloration.

Once selected, the leaves are placed into a sifter, thoroughly rinsed and left to dry for several hours.

At this point, we carefully place the leaves into cast iron and place over a fire, occasionally stirring the leaves with a cedar stir stick. While roasting, we’re looking for dark grayish-green colors to develop and the aroma of baked bread with hints of apple.

Once we’re happy with the color and aroma of the leaves, we remove them from the fire and allow them to cool.

When adequately cooled, we then carefully place the leaves into packets for distribution.


If you’d like to get your hands on some of our tea leaves, please visit our product page: https://pinewoodcornertx.com/products/yaupon-tea/

Practical Tips for Keeping Livestock Water from Freezing

Hydration is critical for your animals’ health, even in the coldest months. Below, we’ve rounded up some practical methods—both low-power and no-power—to help ensure your livestock always have access to fresh water.

Low-Power Solutions

1. Heated Water Buckets and Troughs

Heated buckets and troughs are among the simplest ways to prevent freezing. They come equipped with built-in heating elements that keep the water at a safe temperature. While they do require electricity, most models are designed to be energy-efficient and are a great option if you have access to a reliable power source.

2. Submersible Heaters

If you already have water troughs in place, adding a submersible heater is a quick and flexible solution. These heaters are placed directly into the water and work well for larger tanks. Be sure to choose models with thermostatic controls to prevent overheating and minimize energy use.

3. Solar-Powered Solutions

Solar-powered water heaters are an excellent choice for off-grid farms or those looking to minimize electricity use. Some systems include heating elements, while others rely on insulation and passive solar design to maintain temperatures. They do require an initial investment but can save money over time.

4. Insulated Water Troughs with Heat Tape

Wrap heat tape around water pipes or troughs to add a little warmth. Use insulation around the tape to make the system more efficient. Heat tape is a low-power option and works best when paired with insulated containers.


No-Power Solutions

1. Insulate the Trough or Bucket

Insulation is your first line of defense against freezing. Try wrapping water containers in materials like foam board, old blankets, or even hay bales. Make sure to cover the sides and bottom while leaving the top open for animal access.

2. Use a Larger Water Volume

Larger bodies of water take longer to freeze than smaller ones. Opt for bigger troughs instead of individual buckets. The increased thermal mass helps maintain a more consistent temperature.

3. Add Floating Objects

Place a few floating objects, like a plastic ball or a small piece of foam, in the water. The movement created by wind or animals drinking can help prevent the surface from freezing completely.

4. Digging or Burying the Trough

For a more permanent solution, partially bury your troughs or water lines below the frost line. The ground acts as natural insulation, keeping the water warmer than surface-level setups.

5. Use Salt Water Bottles

Fill plastic bottles with salt water and float them in the trough. The salt water inside the bottle has a much lower freezing point, helping to keep the surrounding water from freezing.

6. Frequent Water Changes

If all else fails, regularly replacing water can keep it from freezing solid. This method is labor-intensive but effective in smaller operations. Use warm water if possible to extend the time before it freezes again.


With a little creativity and preparation, you can keep your livestock’s water supply ice-free all winter long.

Wood Ash Around the Homestead

If you heat your home with a wood stove or enjoy cozy evenings by the fire, you likely have a pile of wood ash building up. Before you toss it in the trash, let me share some homestead secrets: wood ash is a treasure trove of possibilities. From enriching your garden soil to keeping pests at bay, this humble byproduct is a homestead multitasker.

Here are some practical, down-to-earth ways to put wood ash to good use:

1. Natural Fertilizer for Your Garden

Wood ash is rich in potassium and calcium, and it also contains trace amounts of other minerals. If your garden soil leans acidic, adding wood ash can help balance the pH. Just sprinkle a light layer and mix it into the soil. Be cautious, though—wood ash is alkaline, so use it sparingly and avoid applying it near acid-loving plants like blueberries or rhododendrons.

2. Compost Booster

Adding wood ash to your compost pile can help neutralize acidic materials and add essential minerals. Mix it in moderation to maintain a balanced pH and ensure your compost stays nutrient-rich.

3. Slug and Snail Deterrent

If you’ve ever waged war on slugs and snails, wood ash can be your ally. Sprinkle a ring of ash around your plants to create a barrier these slimy critters won’t cross. Reapply after rain, as the ash’s effectiveness diminishes when wet.

4. Pest Control in the Chicken Coop

Wood ash can be sprinkled in your chicken dust bath areas to help control mites and other pests. Your feathered friends will thank you for the added protection as they fluff and dust themselves clean.

5. De-Icer for Walkways

In winter, wood ash can serve as a non-toxic alternative to salt for de-icing walkways and driveways. It provides traction and helps melt ice without harming nearby plants or soil.

6. Cleaning Agent

Need to scrub stubborn stains or polish metal? Wood ash can be mixed with a bit of water to create a gentle abrasive paste. It’s an old-school solution for cleaning glass, pots, and pans.

7. Odor Absorber

Ash has odor-neutralizing properties. Place a small container of wood ash in musty areas like basements or barns to help absorb unwanted smells. It’s also handy for sprinkling in outhouses or composting toilets to keep odors at bay.

8. Soil Amendment for Lawns

If your lawn soil is too acidic, a light dusting of wood ash can help improve its health. Apply it sparingly, and always test your soil’s pH first to avoid overcorrecting.

9. Homemade Soap Ingredient

Feeling adventurous? Wood ash can be used to make lye, a key ingredient in traditional soap-making. This is a more advanced use that requires caution, but it’s a fascinating way to upcycle ash.

10. Emergency Traction Aid

Got a car stuck in snow or mud? A handful of wood ash under the tires can help provide the traction you need to get moving again.

A Few Tips to Keep in Mind:

  • Use Hardwood Ash: Ash from hardwoods like oak, maple, or beech contains more nutrients compared to softwood ash.
  • Avoid Treated Wood: Never use ash from painted, stained, or chemically treated wood, as it can contain harmful toxins.
  • Store Safely: Keep your ash in a metal container with a lid to prevent accidental fires and keep it dry until you’re ready to use it.

Wood ash is a classic example of turning waste into a resource. With a little knowledge and care, this ashy byproduct can become an essential part of your homestead toolkit. So next time you clean out the fireplace, think twice before you toss that ash—it might be just what your garden, chickens, or driveway needs!

Low and No Power Food Preservation

When the power goes out or you’re looking to live off-grid, keeping food fresh without refrigeration can be a real challenge. Here are some tried-and-true methods, along with practical tips to get started.

1. Canning

Canning is a timeless method that involves sealing food in jars to keep it fresh for months (or even years!). Here’s how you can do it:

  • Water Bath Canning: Ideal for high-acid foods like fruits, jams, and pickles. Simply submerge filled jars in boiling water for a set amount of time.
  • Pressure Canning: Use this method for low-acid foods like vegetables, meats, and soups. A pressure canner heats the jars to a high temperature to kill bacteria safely.

Tip: Always use proper canning equipment and follow USDA-approved recipes to ensure safety.


2. Dehydrating

Dehydration removes moisture from foods, making them shelf-stable and lightweight. You don’t need fancy electric dehydrators to get started:

  • Sun Drying: Perfect for sunny climates! Spread thinly sliced fruits or vegetables on a mesh rack and cover with a breathable cloth to keep insects away.
  • Air Drying: Hang herbs or small items like chili peppers in a cool, dry space with good airflow.

Tip: Store dehydrated food in airtight containers to keep it fresh and prevent moisture from creeping back in.


3. Fermentation

Fermenting food not only preserves it but also enhances its nutritional value and flavor. This method works well for vegetables like cabbage (think sauerkraut) or cucumbers (hello, pickles!).

  • Mix vegetables with salt (2-3% by weight) and pack them tightly into a jar. The salt draws out moisture, creating a brine where good bacteria thrive.
  • Make sure your veggies stay submerged in the brine to avoid spoilage.

Tip: Fermentation works best in a cool, dark area. A kitchen counter away from direct sunlight is ideal.


4. Root Cellaring

Root cellars are nature’s refrigerators. Even if you don’t have a dedicated cellar, you can mimic the conditions:

  • Store hardy vegetables like potatoes, carrots, and onions in a cool, dark, and humid space.
  • Use wooden crates, sand, or straw to keep produce from touching and to maintain proper humidity.

Tip: Check stored food regularly for signs of spoilage and remove any affected items immediately.


5. Salt Preservation

Salt has been used for centuries to preserve meat, fish, and even some vegetables. This method is simple but effective:

  • Cover food completely in coarse salt to draw out moisture.
  • For fish or meat, rinse off excess salt before cooking.

Tip: Combine salting with smoking for extra flavor and longevity.


6. Pickling

Pickling isn’t just about cucumbers! You can pickle just about any vegetable, and it’s quick and easy:

  • Use a mixture of vinegar, water, salt, and sugar to create a brine.
  • Submerge veggies in the brine and store them in jars. Most quick pickles are ready to eat in a few days.

Tip: Add spices like dill, garlic, or mustard seeds to customize flavors.


7. Dry Storage

For grains, beans, and nuts, dry storage is key:

  • Store these staples in airtight containers in a cool, dark place to prevent pests and moisture.
  • Add oxygen absorbers or bay leaves to deter bugs.

Tip: Rotate your stock regularly to use up older items first.


Final Thoughts

Learning power-free food preservation is a practical skill to help ensure food security. Start small with one or two methods, and experiment to find what works best for your lifestyle.

Rainwater: Good for You and the Planet

Let’s dive into why harvesting rainwater is a smart move and explore its potential benefits compared to groundwater.

Why Harvest Rainwater?

Rainwater harvesting is the process of collecting and storing rain for later use, and it’s gaining traction for good reasons. Here are a few:

  1. Environmentally Friendly: Rainwater harvesting reduces the strain on municipal water systems and helps prevent runoff that can lead to soil erosion and waterway pollution.
  2. Cost-Effective: By using rainwater for tasks like watering plants, flushing toilets, or even drinking (with proper filtration), you can significantly cut down your water bills.
  3. Emergency Preparedness: In case of water supply disruptions, having a reserve of rainwater ensures you’re not left high and dry.

Rainwater vs. Groundwater: The Health Angle

Both rainwater and groundwater can be sources of drinking water, but they’re not created equal. Here’s a closer look at how they stack up:

  1. Purity of Rainwater: Rainwater is naturally distilled by the water cycle, meaning it doesn’t contain the heavy minerals or contaminants often found in groundwater. This makes it a great starting point for drinking water, provided it’s properly filtered.
  2. Groundwater Challenges: Groundwater comes from underground aquifers, which are susceptible to contamination from pesticides, industrial waste, and naturally occurring heavy metals like arsenic. Treating groundwater to make it safe for drinking can be a complex and costly process.
    • Environmental Toxins: Of course, rainwater isn’t immune to pollution. In urban or industrial areas, rain can pick up contaminants from the air or roofs. However, a good filtration system can remove most of these impurities, making rainwater a safe and healthy option.

    Harvesting rainwater isn’t just about saving money or being environmentally conscious—it’s also about embracing a healthier lifestyle. Compared to groundwater, rainwater (with proper treatment) can be a safer and purer option, free from many of the contaminants lurking beneath the surface.

    So, why not take advantage of nature’s free resource? By harvesting rainwater, you’re not only making a sustainable choice but also prioritizing your health. And honestly, that’s a win-win we can all get behind.

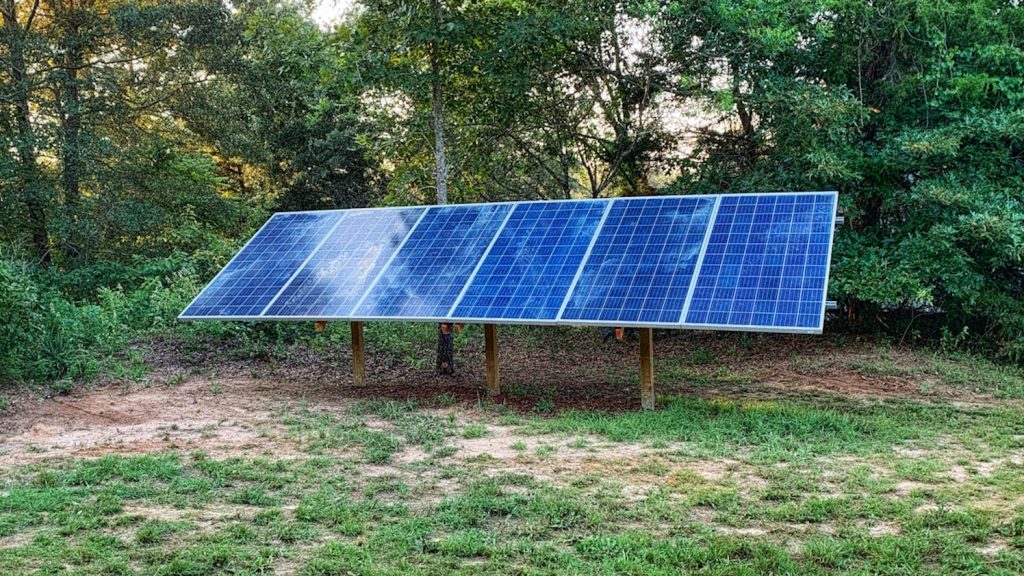
    Keeping Costs Down in Your DIY Solar System

    Switching to solar power is a great way to reduce energy costs and embrace sustainable living. But let’s face it—designing your own solar power system can feel overwhelming, especially when you’re trying to stay within a budget. The good news? With a bit of planning and some savvy choices, you can build a cost-effective solar setup without compromising on performance. Here are some practical tips to help you get the most bang for your buck.

    1. Start with a Clear Plan

    Before buying anything, take the time to determine your energy needs. Calculate how much electricity you consume daily by checking your utility bills or using an energy monitor. This will help you figure out the size of the system you need. Oversizing your system can unnecessarily drive up costs, so focus on right-sizing it for your actual requirements.

    2. Shop for Second-Hand Components

    Not everything in a solar system has to be brand new. Consider buying used or refurbished solar panels, inverters, and other components. Websites like eBay, Craigslist, or specialized solar resellers often have excellent deals. Just make sure to verify the condition of these items and confirm they come with a warranty or have been tested for functionality.

    3. Opt for Polycrystalline Panels

    Monocrystalline panels are more efficient but often come with a higher price tag. If you’re working with limited space and budget, polycrystalline panels can be a more affordable option. They might take up slightly more space for the same output, but the savings can be worth it if you’re not constrained by roof area.

    4. DIY the Installation

    Hiring professionals to install your solar panels can be expensive. If you’re comfortable with tools and basic electrical work, consider doing the installation yourself. There are countless tutorials and guides available online to walk you through the process. However, make sure to follow local regulations and safety guidelines to avoid issues.

    5. Buy in Bulk

    If you’re purchasing solar panels, wiring, or mounting hardware, look for bulk discounts. Many suppliers offer lower per-unit prices if you buy multiple panels or accessories at once. Teaming up with neighbors or friends who are also interested in going solar can help everyone save money.

    6. Use a Simple System Design

    Keeping your system’s design straightforward can save you money on both materials and installation. For example:

    • Choose a ground-mounted system if your roof is complicated or shaded.
    • Opt for string inverters instead of microinverters, as they tend to be cheaper.
    • Minimize the use of battery storage unless it’s absolutely necessary (e.g., for off-grid systems).

    7. Leverage Tax Credits and Incentives

    Many countries and states offer tax credits, rebates, or grants for installing solar power systems. In the U.S., for instance, the federal Investment Tax Credit (ITC) can significantly reduce your upfront costs. Research what’s available in your area to take full advantage of these programs.

    8. Don’t Skimp on Quality Where It Counts

    While it’s important to save money, avoid cutting corners on critical components like inverters and mounting equipment. Cheap, low-quality products might fail prematurely, costing you more in repairs or replacements down the line. Aim for a balance between affordability and reliability.

    9. Consider Energy-Efficiency Upgrades

    Reducing your overall energy consumption can lower the size and cost of your solar system. Simple upgrades like LED lighting, energy-efficient appliances, and better insulation can make a big difference.

    10. Incorporate Propane Appliances

    Using propane appliances for tasks like cooking, water heating, or even refrigeration can significantly reduce your electrical demand. This allows you to install a smaller and more affordable solar power system. Propane is often a cost-effective and reliable energy source, especially in off-grid setups.

    11. Plan for Future Expansion

    If your budget is tight, start small and design your system so it can be expanded later. For example, install a few panels now and add more as your needs grow or your budget allows. This approach lets you spread out the costs over time.

    Final Thoughts

    Designing a DIY solar power system on a budget is entirely possible with the right mindset and strategies. By carefully planning, shopping smart, and staying informed, you can create a system that meets your energy needs without breaking the bank. Not only will you save money in the long run, but you’ll also take a big step toward energy independence and a greener future.